
Power Pages Designer Studio has revolutionized the editing and building process of Power Pages by introducing an intuitive drag-and-drop interface, eliminating the need for complex coding. This innovation has made web development more accessible, allowing users to easily craft and customize their sites with real-time visual feedback.
As Power Pages continues to evolve, we’re seeing an exciting rollout of new features, enhancing its versatility and functionality. Notably, the recent integrations with DocuSign and Stripe stand out, offering users seamless external capabilities for electronic signatures and online payments directly within their Power Pages sites, further broadening the platform’s applicability in various business scenarios.
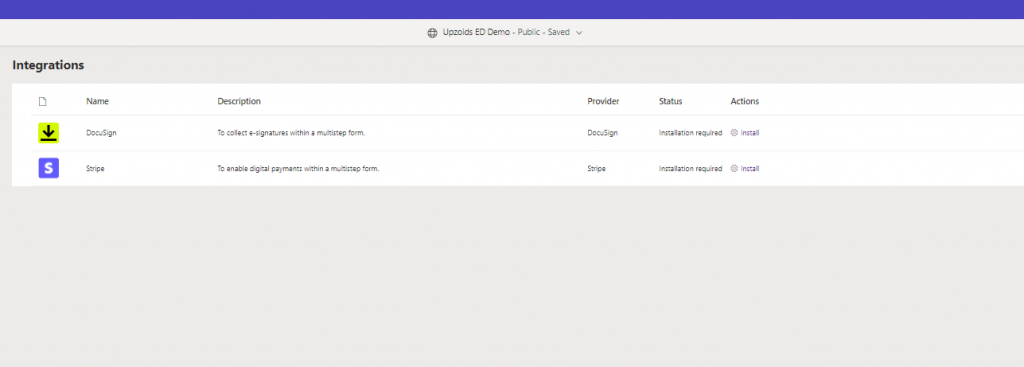
In this Blog, we will review , How DocuSign Integration works
Step 1: To get started open the Power Pages Portal in designer editor for editing and navigate to External apps under the “Setup” area.
Step 2: from the list view initiate install for DocuSign.
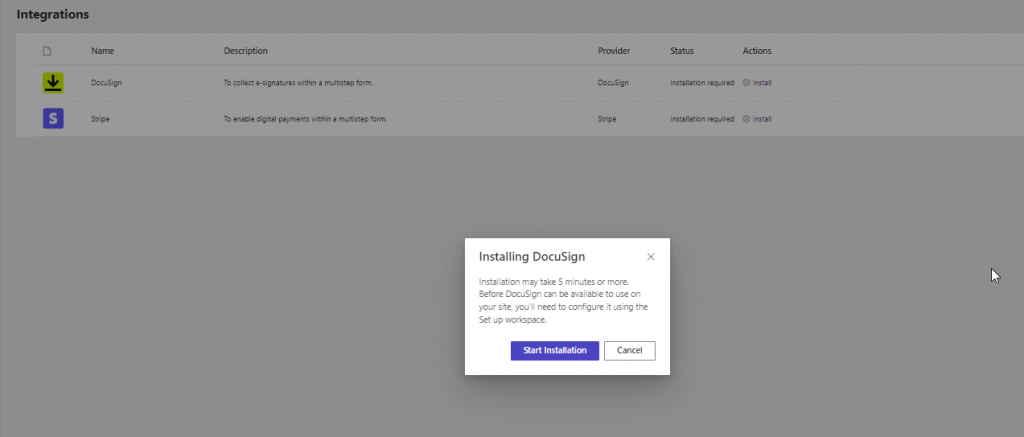
Installation take about 5 Min, enough to get a coffee ready before we get into the fun stuff.
Step 3: Once installed the configuration option will show up. Upon clicking configure, it will prompt you to resolve the Connection references for Power Automate which is used to facilitate connection and automation.
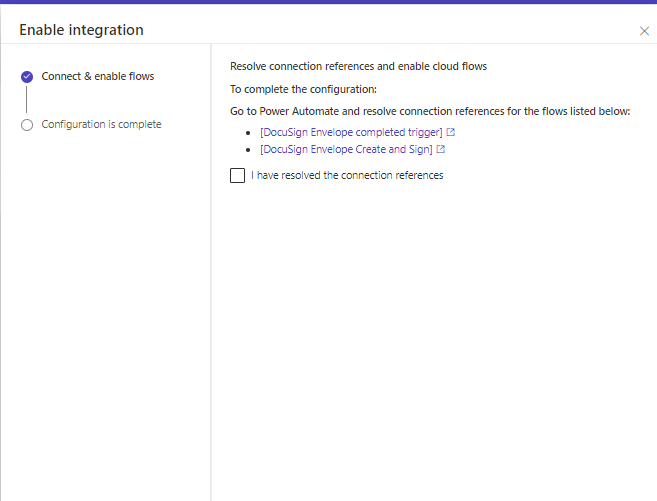
Navigate to Power Automate flows to resolve the connections.
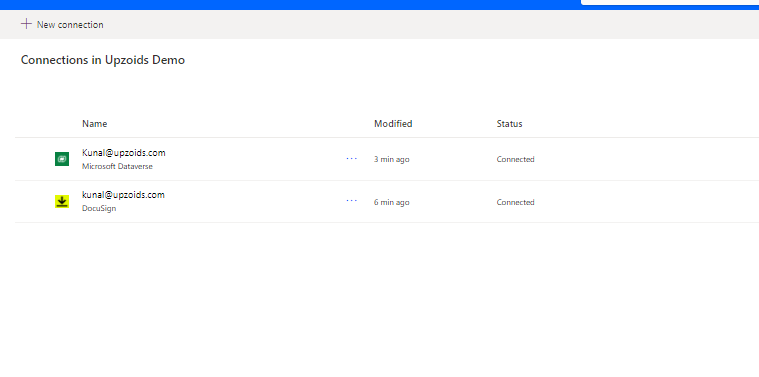
Step 4: Resolves connections: Navigate to connections and resolve both the connection to Dataverse and the DocuSign
Step 5: Navigate to both the Power Automate flows, validate connection, and turn them on.

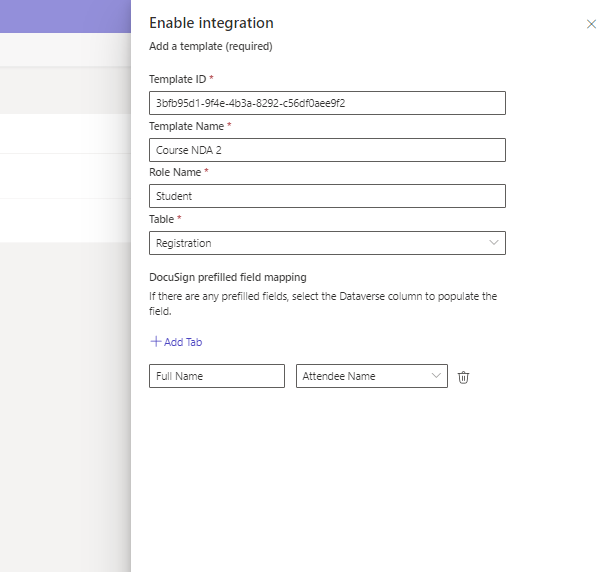
Step 6: Next step is to Enable Integration by selecting Template. IN this demo We have a Template pre-created in DocuSign, SO I will populate the template details and save.
Step 7. Now that Configuration is done, we need to setup the power pages where Templates will be made available. We need to create a Multi Step Form for the integration to work.
In this example we are using the Course Registration process with signature,
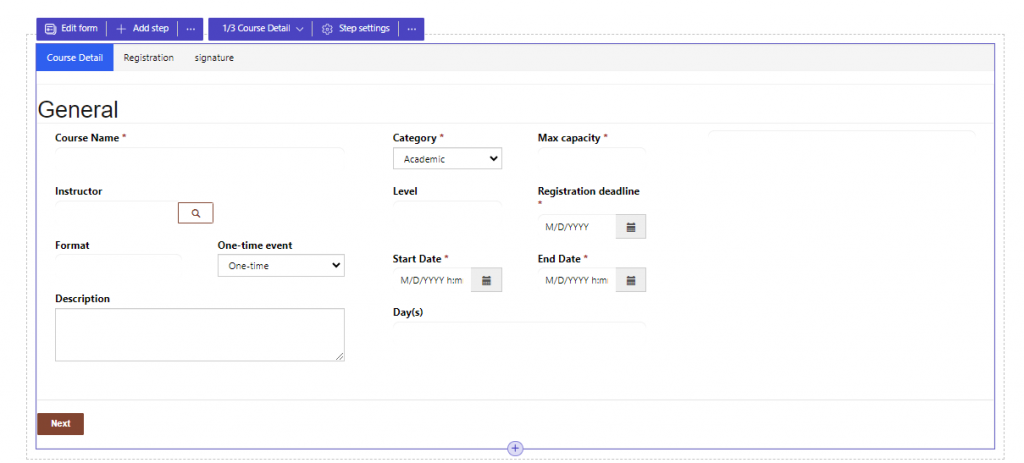
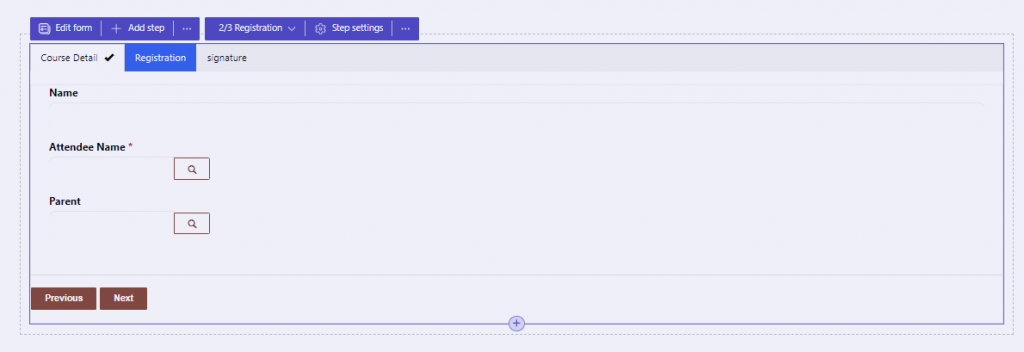
The form will have three step:
Step 1: Course Detail (Read Only step, where you can see the course you are registering for.
Step 2: Registration (Insert step which will create a registration record in table)
Step 3: Signature Step., For the signature step we still use the Registration entity but enable Integration under step settings.
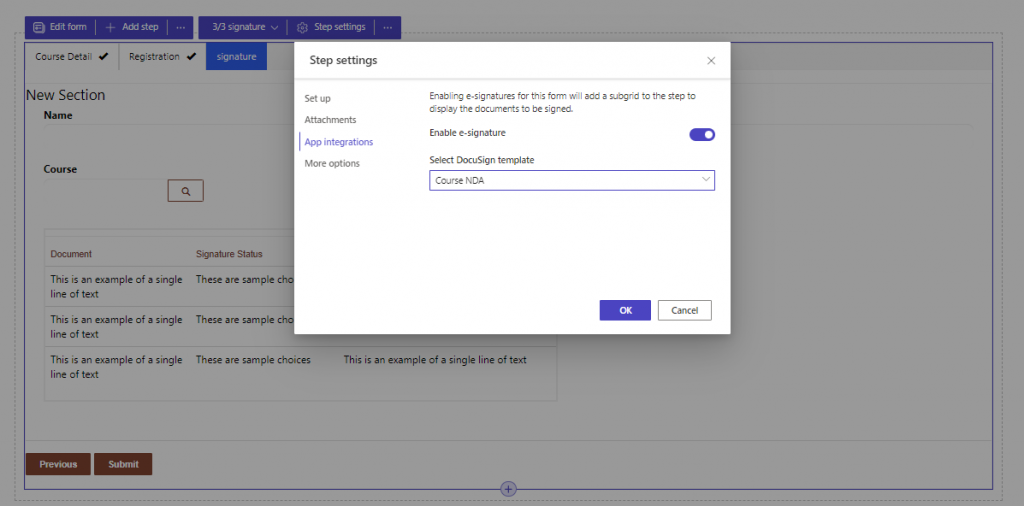
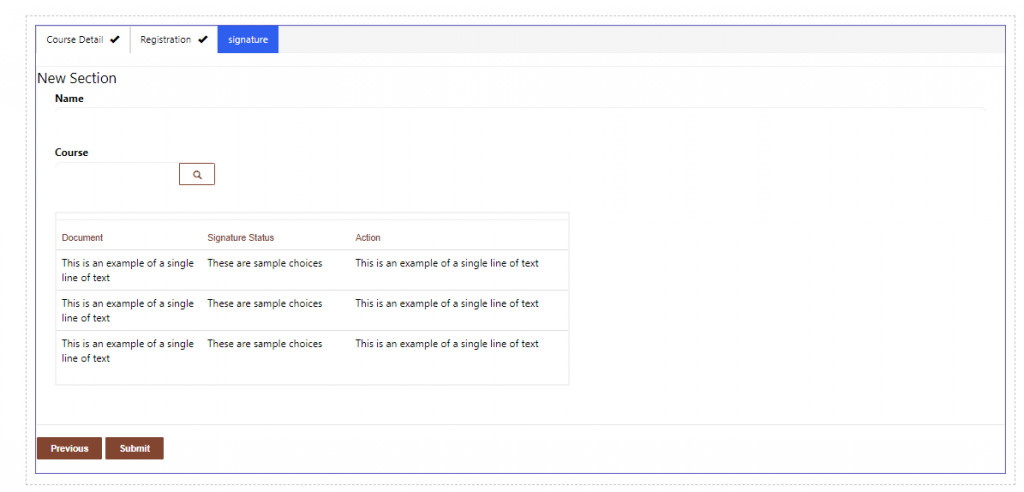
when you enable signature step, behind the scene step on the form gets a new sub grid added to it with additional code for signature to be enabled.
And with that you have enabled E-signature on Power pages using DocuSign.